
Building an Animatronic Ghost: From Idea to Working Mechanism
Sometimes a project starts with a very simple idea:
Make a ghost slowly rise from behind a tombstone—and then disappear again.
That simple idea turned into a much more interesting engineering project than I expected.
I wanted to build a lightweight Halloween ghost that could rise about 14 inches from behind a tombstone, move smoothly and quietly, and then descend again. I also wanted the entire mechanism to stay hidden from the audience and operate reliably through repeated cycles.
The project eventually combined woodworking, mechanical design, 3D printing, electronics, programming, and quite a bit of experimentation.
Starting With the Mechanical Design
The ghost itself weighs only about a quarter of a pound, so lifting it never presented much of a challenge. Guiding it smoothly through its full range of motion became the real challenge.
I chose a 14-inch full-extension drawer slide as the backbone of the mechanism.
I mounted the stationary section vertically to a wooden upright and attached a small plywood carriage to the moving section. That arrangement gave the ghost a rigid and repeatable vertical path while keeping the mechanism reasonably compact.
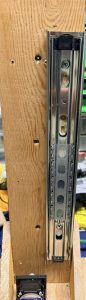
One lesson appeared early in the project: I needed to design around the ghost itself, not just around the motor and slide.
The ghost has a molded plastic head surrounded by very light gauze-like fabric. Any exposed bolt, sharp corner, belt, pulley, or rough wooden edge could catch that fabric.
I rounded and sanded wooden edges, shortened fasteners where practical, and paid close attention to anything that might snag the material during movement.
Designing a Custom Ghost Cradle
Attaching the ghost to the moving carriage created another design problem.
The molded plastic head has a tapered and irregular shape rather than a simple cylindrical one. The foam arms also emerge near the bottom of the head, which ruled out many simple clamp or ring designs.
I solved that problem with a custom 3D-printed cradle.
I measured the ghost head at several heights and designed the cradle around those measurements. The cradle supports the lower portion of the head while leaving room for the foam arm structure.
A slot through the cradle allows the arms to pass through without interference.
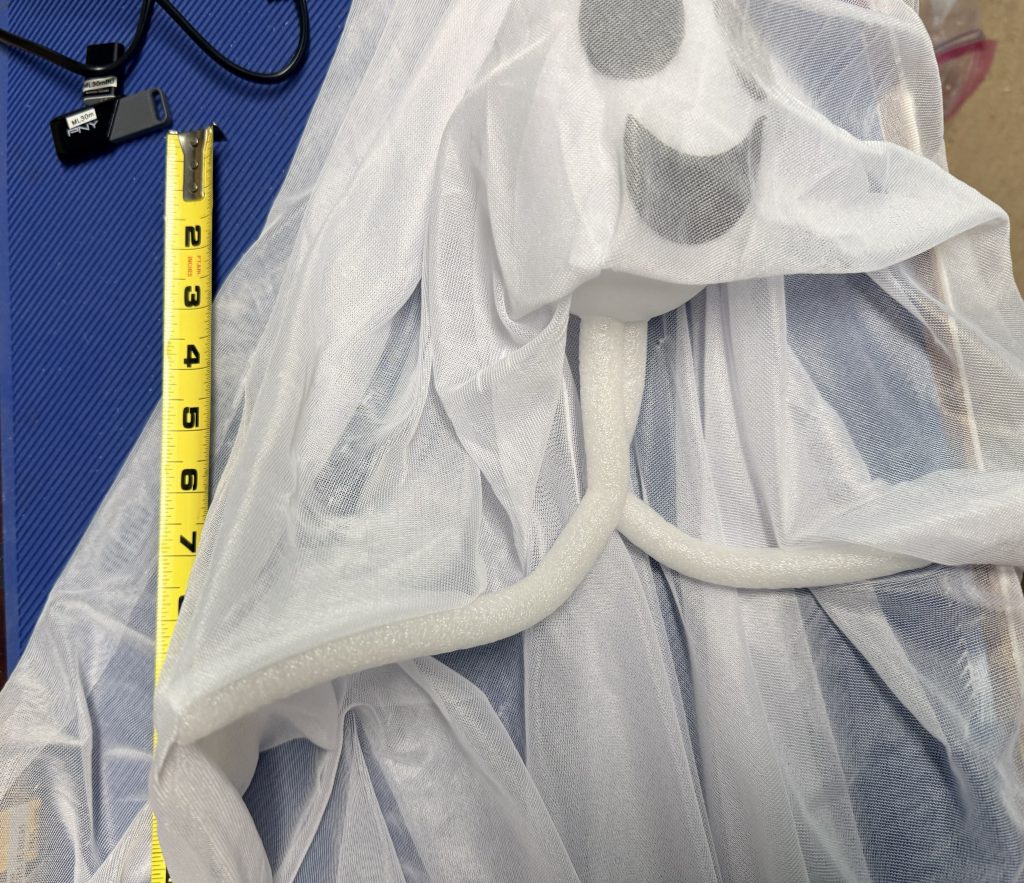
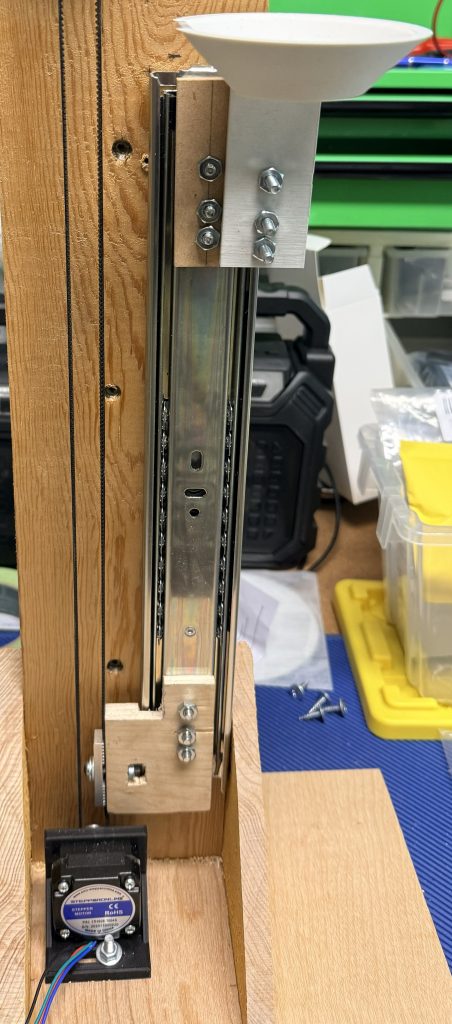
3D printing worked especially well for this part of the project. Instead of fabricating an awkward shape from wood or metal, I could change the CAD model, print another version, test it, and make another adjustment if necessary.
One revision removed a small interference point that looked harmless in CAD but became obvious when I installed the actual ghost.
That reinforced a familiar engineering lesson: the real hardware always gets the final vote.
Driving the Ghost With a Timing Belt
After I had the slide and carriage working properly, I turned my attention to the drive system.
I used a NEMA 17 stepper motor, a GT2 timing belt, and 20-tooth pulleys. The belt connects to the carriage and moves the ghost up or down as the motor turns.
I also designed and 3D printed a custom motor bracket.
The bracket went through several revisions before I reached the final version. I needed enough rigidity to hold the motor securely, but I also needed adjustment for belt tension and proper access to the mounting screws.
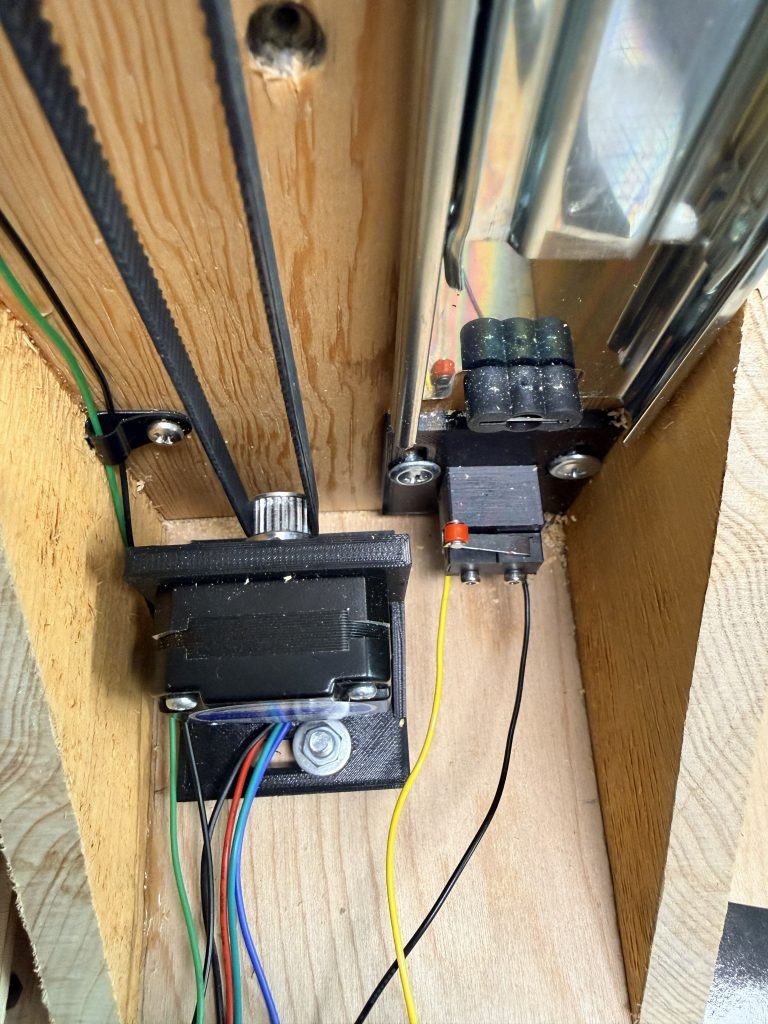
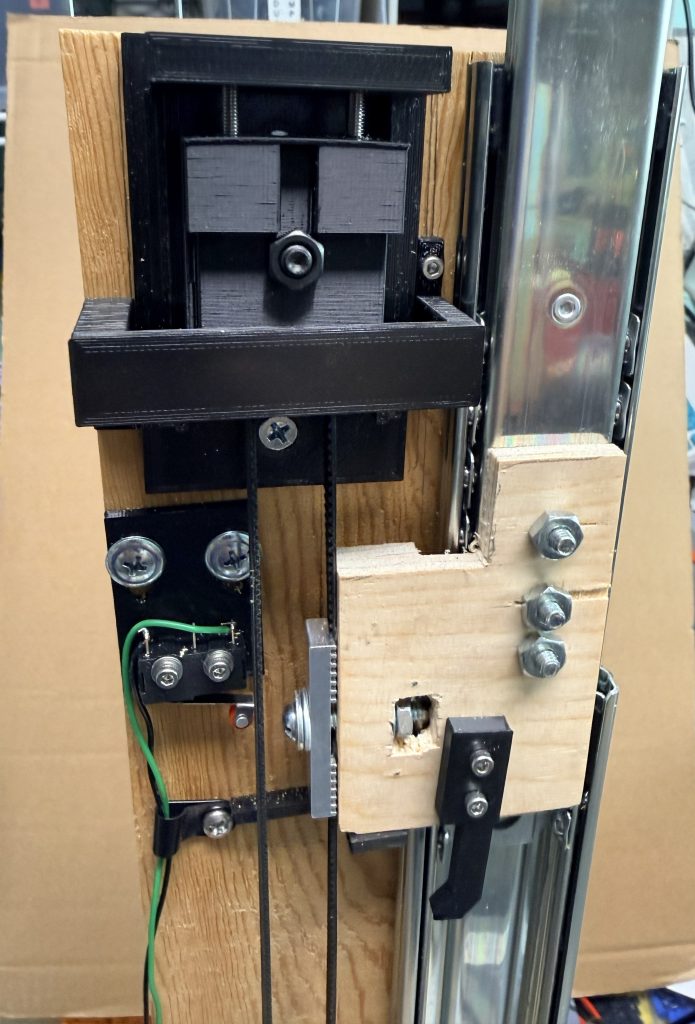
This part of the project taught another useful lesson: a mounting hole does not help much if a screwdriver cannot reach it. The final bracket leaves enough space around the screws and adjustment slots for normal tools and normal screw heads.
I also needed a way to guide and tension the belt at the opposite end of the drive. I used a floating idler pulley so I could fine-tune belt alignment and tension instead of depending entirely on the motor position.
That created another small design problem: the idler needed a secure mounting point on the upright while still retaining its adjustment. I designed a separate bracket to hold the floating idler in position and keep the belt path aligned with the carriage and motor pulley.
Once I installed the motor, belt, idler, and carriage together, I reached an important milestone.
The ghost traveled through its full range of motion, the belt stayed centered, and the system operated without slipping.
Adding the Electronics
I used an ESP32 micro-controller to control the motion and a TMC2209 driver to operate the stepper motor.
A 12-volt power supply provides the main power, and a small buck converter supplies the lower voltage needed elsewhere in the electronics.
I also added two roller-lever limit switches.
The lower switch establishes the home position, while the upper switch protects the mechanism from excessive upward travel.
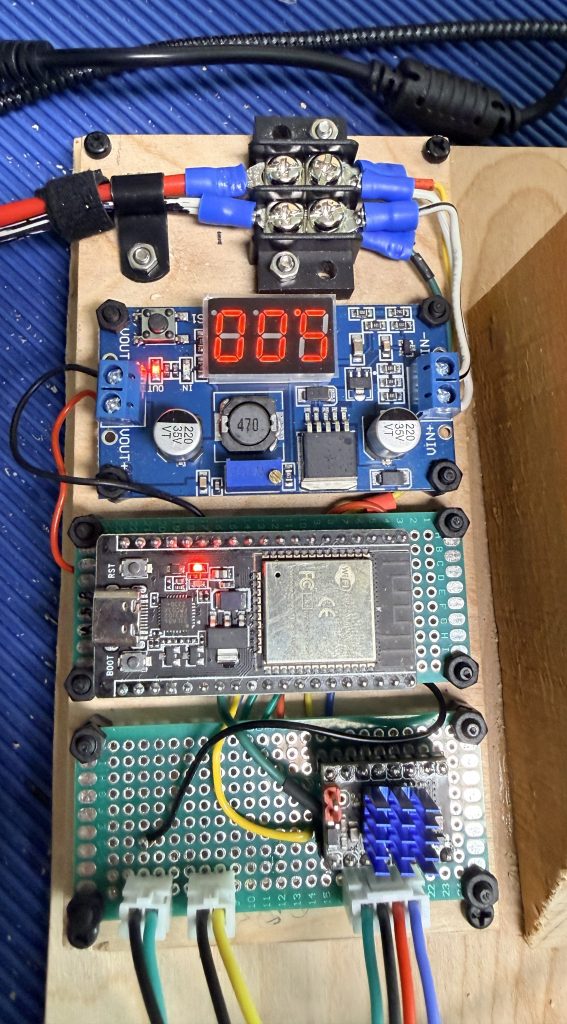
I mounted the electronics in a removable area on the left side of the mechanism, which I call the Electronic Bay.
I deliberately kept the ESP32 USB connector accessible so I could update the program without removing the controller from the project.
That accessibility proved useful many times during testing.
Teaching the Ghost How to Move
Once the mechanics worked reliably, I could start giving the ghost some personality through software.
The first routine uses a traditional motion. The ghost slowly rises from behind the tombstone, stays visible briefly, and then drops back down somewhat faster.
The second routine adds a little more character. In the “peek” routine, only the ghost’s head slowly appears above the tombstone. It pauses as though it wants to look around, then suddenly drops out of sight.
[Photo suggestion: A sequence showing the normal rise and the peek routine.]
I kept increasing the speed of that sudden drop until I found the right balance between surprise and reliable operation. The system handled the faster motion without belt slippage.
I then changed the software so the ESP32 randomly selects between the normal rise and the peek routine. That small programming change made a major difference. If the ghost performs the same sequence every time, viewers quickly learn what to expect. Random selection makes the prop less predictable and gives it more personality.
Homing and Limit Switches
I also wanted the ghost to know where it started every time I turned on the system.
At startup, the ESP32 runs a homing sequence and moves the carriage toward the lower limit switch. When the switch activates, the controller establishes that position as zero.
An early version produced an annoying delay of roughly 35 to 40 seconds before it found home. I eventually corrected that problem, and the homing sequence now works properly. The limit switches also provide a useful layer of protection against programming mistakes or unexpected motion.
Seeing a mechanism move correctly once feels satisfying. Seeing it find home repeatedly, select different motion routines, and stop exactly where it should starts to feel like a finished machine.
Protecting the Ghost From the Machinery
One of the final mechanical challenges had nothing to do with lifting the ghost. I needed to protect the fabric from the mechanism. The gauzy material and a moving timing belt make a particularly bad combination. If the fabric reaches the belt or pulley, the drive could wrap it almost instantly. The drawer slide also creates several possible pinch and snag points.
For those reasons, I decided to add a removable protective cover around the moving mechanism.
Space is tight. I measured about 20 mm between the back of the cradle and the upright. With the ghost installed, the back of the head comes within about 17 mm of that same upright. In the tightest area, only a few millimeters remain between the head and cradle geometry.
That means the protective cover must keep the fabric away from the belt and slide without interfering with the ghost’s movement. Even something as simple as “put a cover over it” can become its own design problem. For materials, I looked on the floor and saw a box that 3D filament came in. It was just the right thickness combined with stiffness. A pair of scissors, some screws and the protective cover was in place. It didn’t have to be pretty, as it is behind the tombstone and the gauze.
A Project Made From Many Small Solutions
No single component in this project qualifies as especially exotic.
I used a drawer slide, a timing belt, a stepper motor, an ESP32, a couple of limit switches, some plywood, and several 3D-printed parts.
The interesting part came from making all of those pieces work together.
I came away from the project with several useful lessons:
- I need to design around the actual moving object, not just around dimensions in CAD.
- I need to leave room for both fasteners and the tools that reach them.
- Real hardware often exposes problems that never appear on the computer screen.
- Mechanical testing should come before too much software refinement.
- Limit switches provide inexpensive protection for automated mechanisms.
- Soft fabric near belts and pulleys demands careful attention.
- Small software changes can create a surprisingly large improvement in an animatronic effect.
Most of all, I enjoyed combining several kinds of fabrication in one project.
Woodworking created the basic structure.
The drawer slide provided accurate linear motion.
3D printing solved awkward mechanical interfaces.
Electronics provided control and protection.
Programming turned simple movement into a performance.
The final result looks simple from the front.
The ghost rises from behind the tombstone, pauses, and disappears.
Sometimes it only peeks over the top before suddenly dropping away.
That simplicity is exactly what I wanted.
The machinery stays hidden.
The ghost gets all the attention.